3 easy steps for a custom 3D Map in 30 seconds
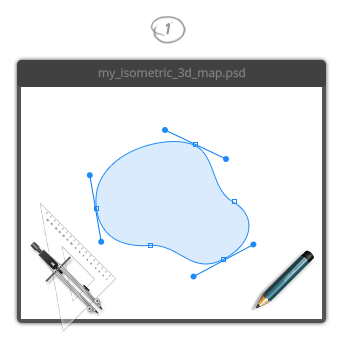
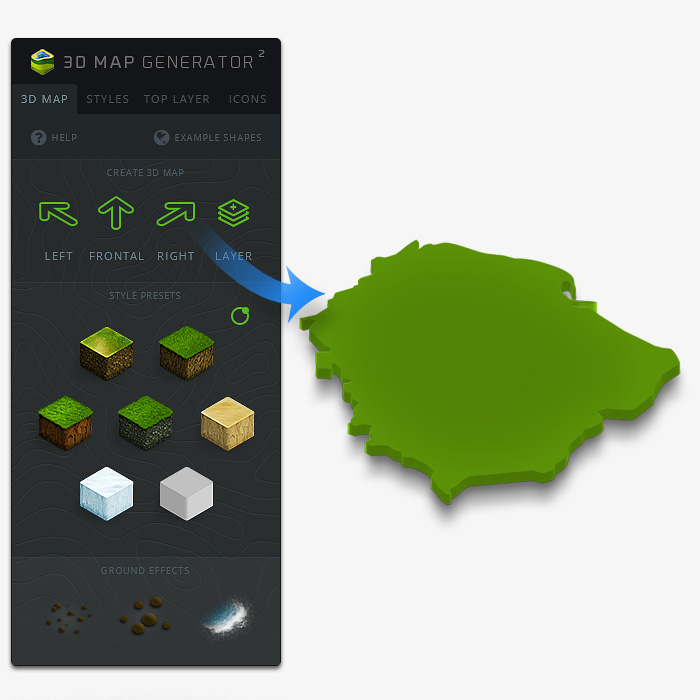
Step 1. Create your Shape
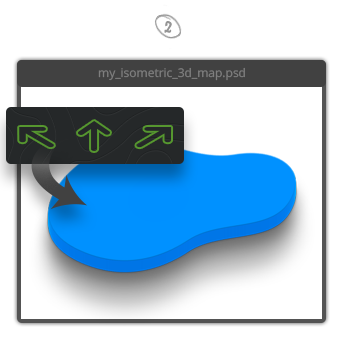
Step 2. Choose your favourite direction
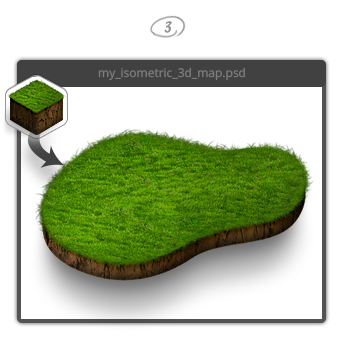
Step 3. Choose a Style Preset – Done!
How it works
3D Map Generator gives you powerful and easy-to-use tools to create your own 3D Map
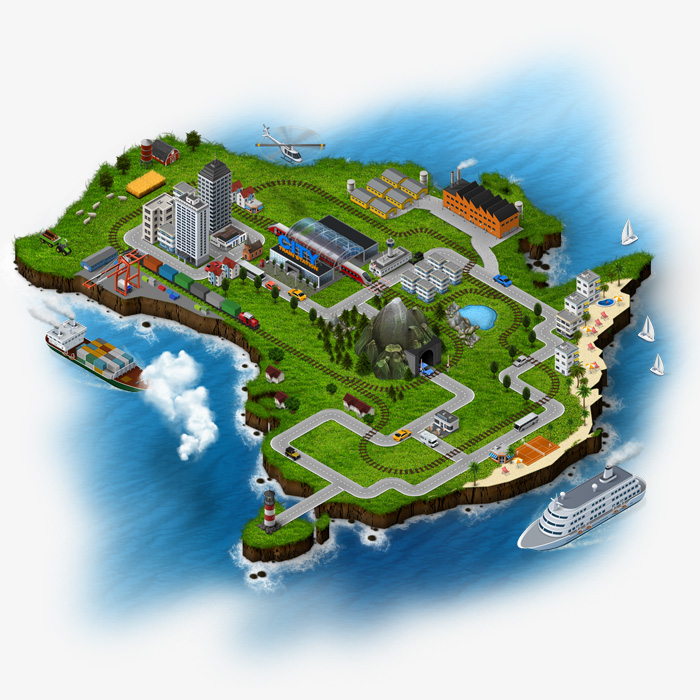
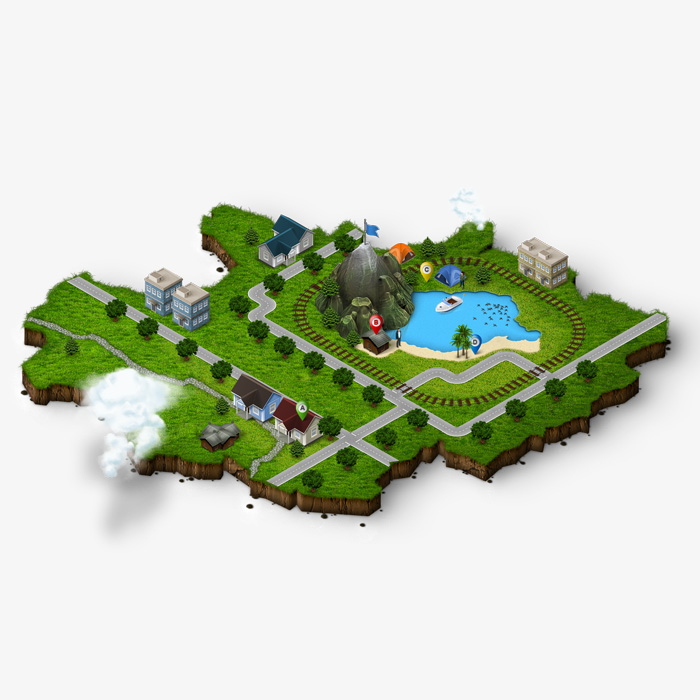
With the 3D-Map-Generator-2 you can easily and quickly generate your own 3D Map in Photoshop. The result is really professional, but you don’t have to be a professional therefor! Design your own city or just create driving directions. Visualize a building project, an infographic for your next presentation, a concept for a computer game or graphics for a mobile app! (For example a personal Google map – watch the tutorial).
There are many application possibilities for the 3D-Map-Generator and the additional Map Icons.
You can edit every designing option at every time. You can also save your 3D Map as a PSD file to work on it again later. All layers remain as they are. Nothing is merged or flattened. The video tutorial for the 3D-Map-Generator-2 you can find here: Tutorial Videos
3D Map
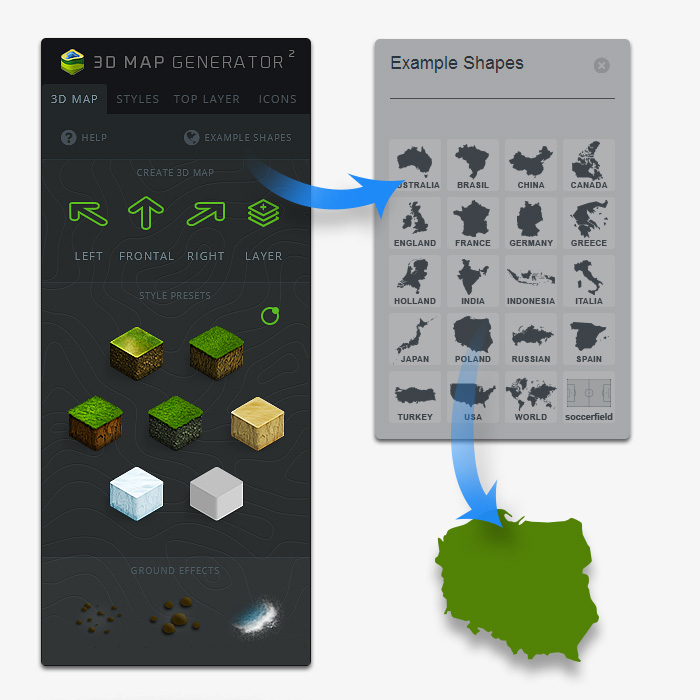
First create a new document in Photoshop with the desired size. As a base for the 3D Map you can use vector shapes, pixel shapes, text layers or SmartObjects. Of course you can also use one of the 19 example shapes. Therefor you have to click on the example shape button in the panel to reach the assortment.
Note: (CS6 only) If you are using the panel for the first time, click on the „Install“ button to install every required elements.
In the next step you have to choose your desired direction for the 3D Map: left, frontal or right. The result will be an isometric map that can be designed further.
Determine the height of the map and add as many layers as you want by using the button „+ Layer“.
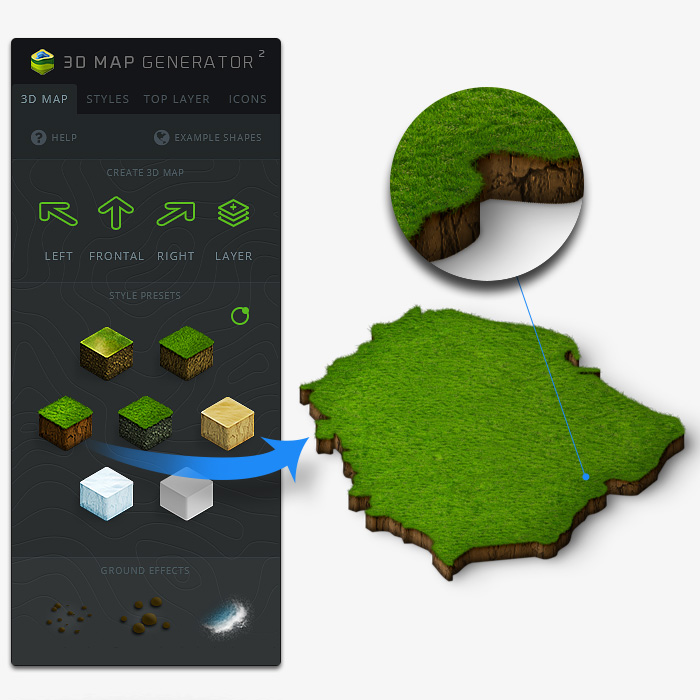
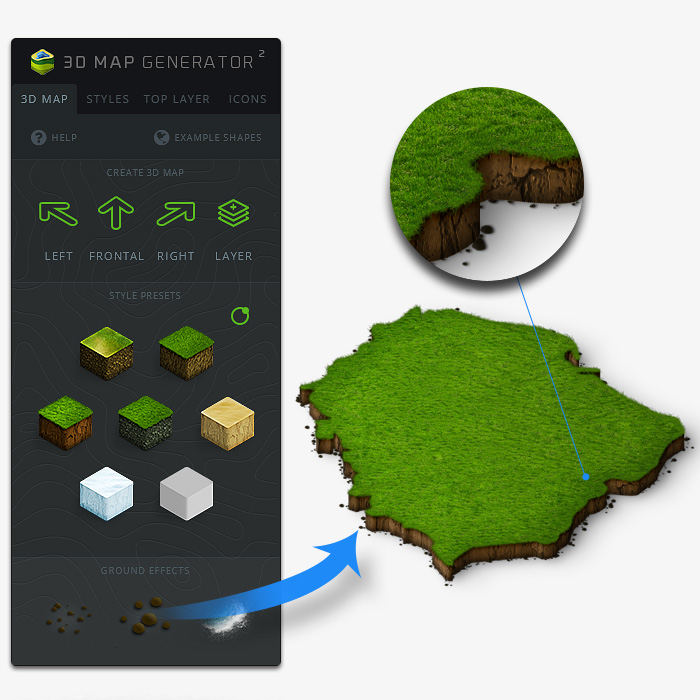
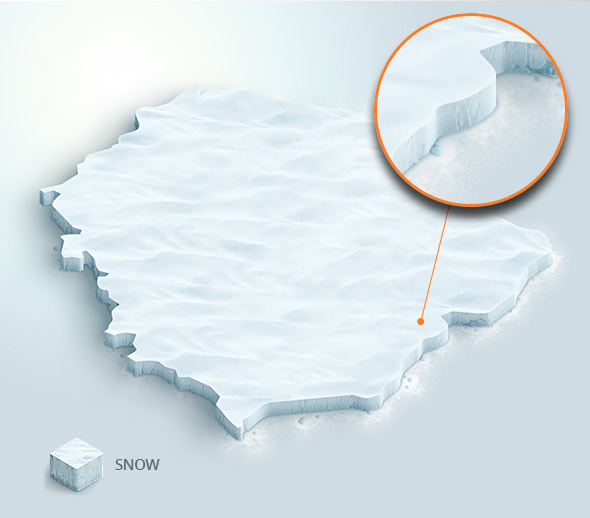
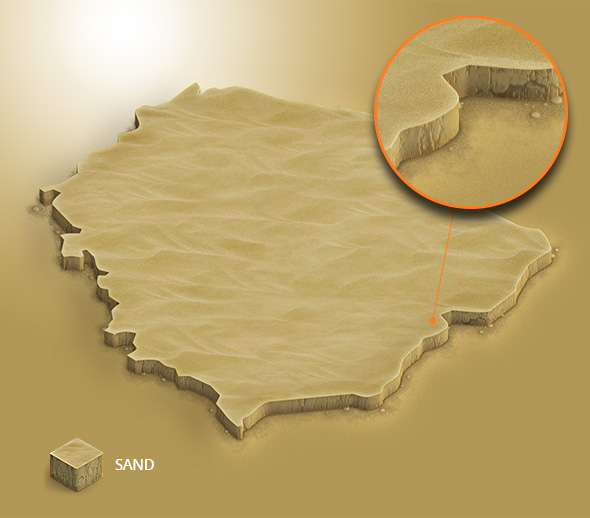
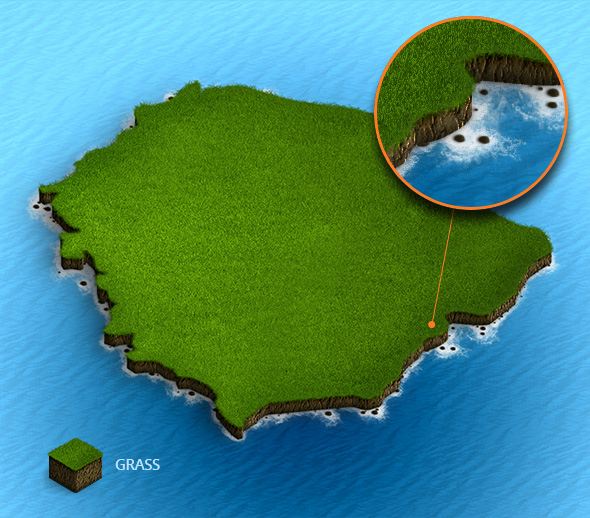
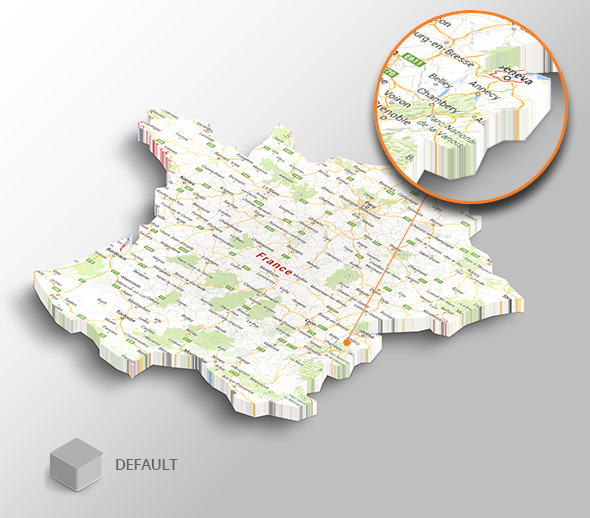
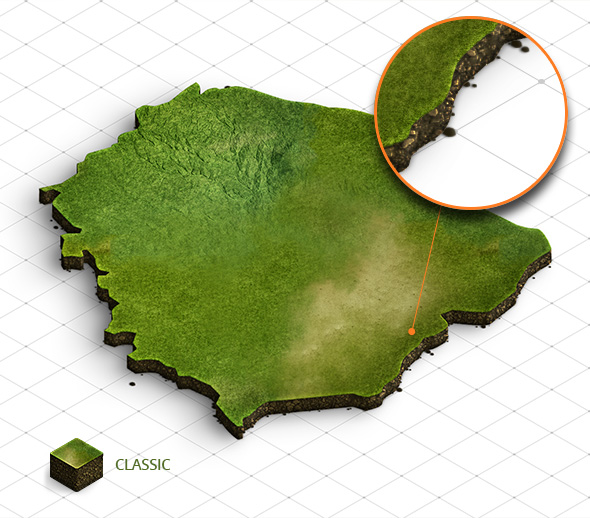
With the style presets you have 7 possibilities for a quick styling. If you like, you can edit or refine it in the tab „Styles“.
With the „Ground Effects“ you can add the effects „gravel“ and „spume“ – as often as you want.
Styles
In the tab „Styles“ different possibilites are available to edit your map layout after your fancy. Change the background of your map: Here are 7 presets available. But of course you can also create and integrate your own backgrounds.
With the options under „Surface“, „Layer Textures“ and „Layer Colors“ you can further edit your map as you like. Tutorial videos you will find here!
The structures of the side surfaces and the shadows can be regulated by the Global Light function. It creates impressive realistic effects.
Beside the presettings you can of course edit all map surfaces seperately. Theoretically there are over 630 style variants possible.


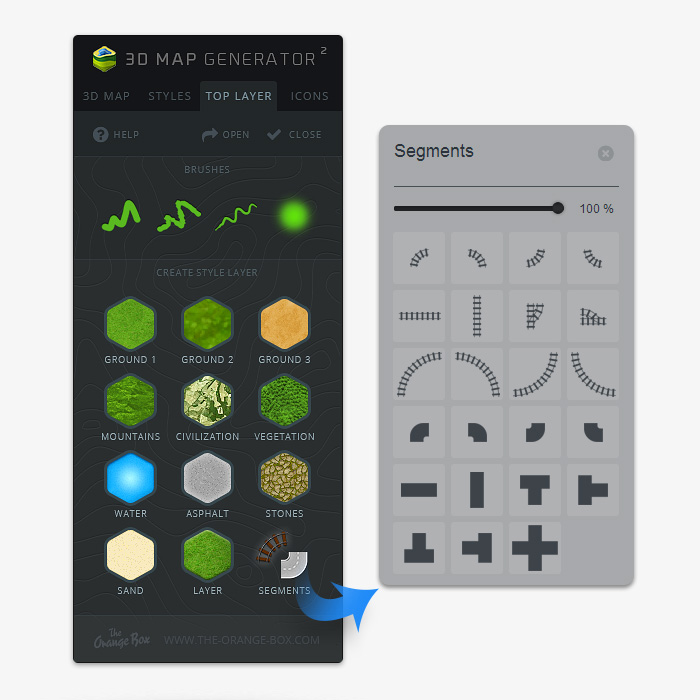
Top Layer Designer
With the Top-Layer-Designer you have many possibilities to design the surface of your 3D Map. Therefor will be used a SmartObject that can be edited over and over again. The Top-Layer has the same isometric direction as your 3D Map. That means that every element you are adding in the Top-Layer will fit pixel accurately and perfectly isometric to you map:
1. Click „open“ to open the Top-Layer
2. For designing the terrain choose a style layer from the panel
3. You can use the premade brushes from the panel or your own. Play with the opacity to create a smooth transition
4. Add streets and rails by using the premade segments (Click on „Segments“)
5. Click „close“ to safe and close the Top-Layer
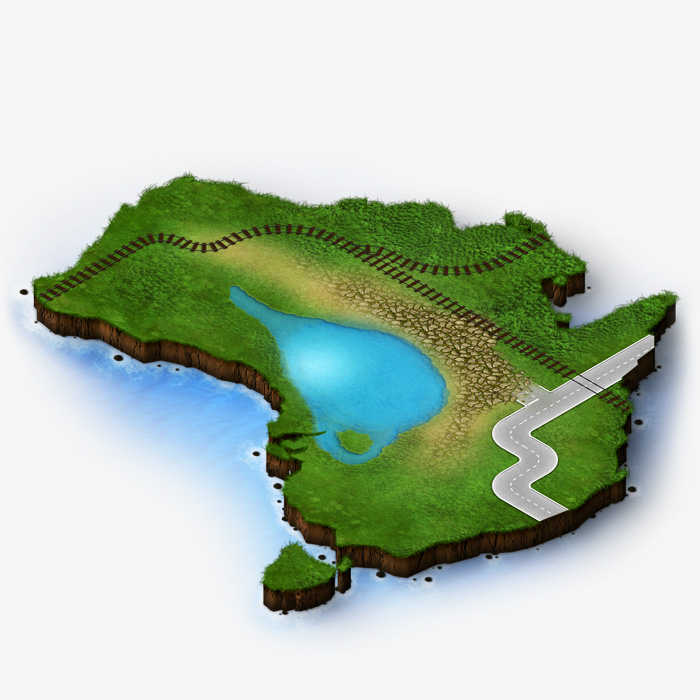
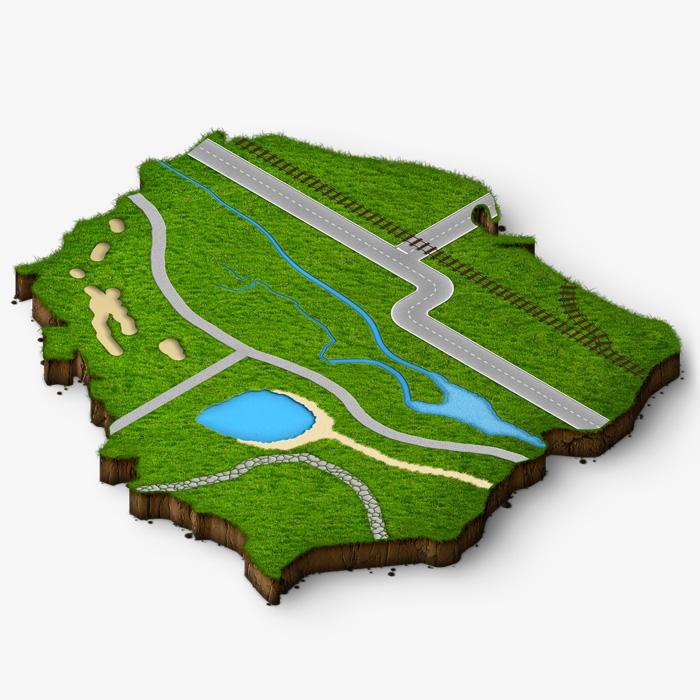
For designing the Top Layer there are different brushes available. Draw some roads, paths, rivers and lakes.
With the free update 1.3 there are now also pre-built road and rail segments available. By using the button „Segments“ you will reach the assortment. With that you can quickly arrange complex maps.
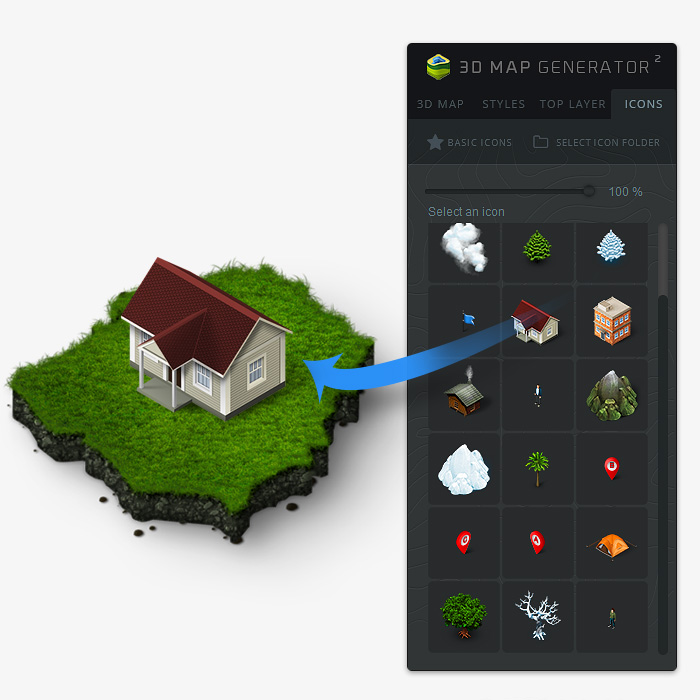
Isometric Icons
For finishing you can place some icons and other isometric elements on your map. Of course you can use every isometric icon that is available. Included in the 3D-Map-Generator-2 package are 20 basic icons. You can find them under the tab „Icons“ in the panel.
Icon Library
In the panel version CC-2014 and CC-2015 it is possible to load own icons into the panel. You can upload PNG files or PSD files with only one layer. Did you also buy the isometric icon sets from us? Then easily select the folder „psds_single“ in the set to load the editable icons into the panel.
All details and purchase options can be found on our envato homepage.