3D Map Generator Atlas – Documentation
For support questions please visite the support page first.
For support questions please visite the support page first.
IMPORTANT: Do not modify the content of the 3D Map Generator folder! If you modify the content of the folder, the plugin will no longer work. Then you have to download it again.
Important: The Plugin will only work in the English version of Photoshop . If you are not using the English version of Photoshop, you can always change it to English and then back again to your native language using.
For creating a bigger 3D map from a heightmap and a Google Map texture, the source document has to be enlarged. Please watch this short tutorial:
The finished 3D map has a default resolution of 72 dpi. If you simply raise it to 300 dpi, the result would be blurry. The resolution has to be raised without changing the dimensions of the map to keep the result sharp.
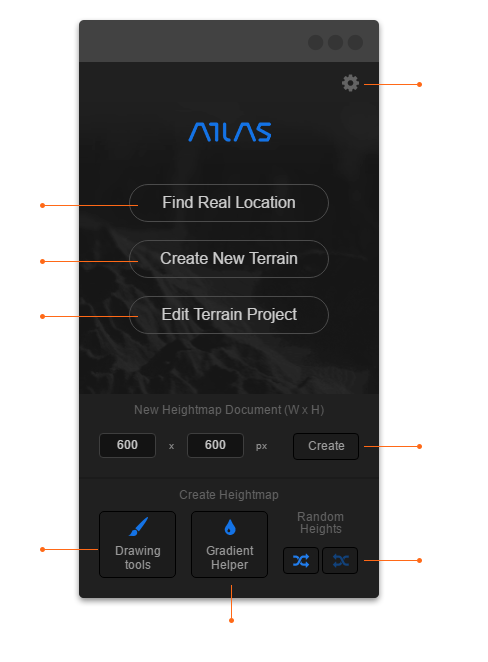
1 Panel options and support links
2 Heightmap browser – search and download heightmaps
3 Create a new 3D map project
4 Edit an already created Atlas 3D map project
5 Create a new document to design your own heightmap
6 Create random (elevated or flat) heightmaps
7 Heightmap brushes and tools
8 Add a gradient helper for more a graphical view of the heightmap
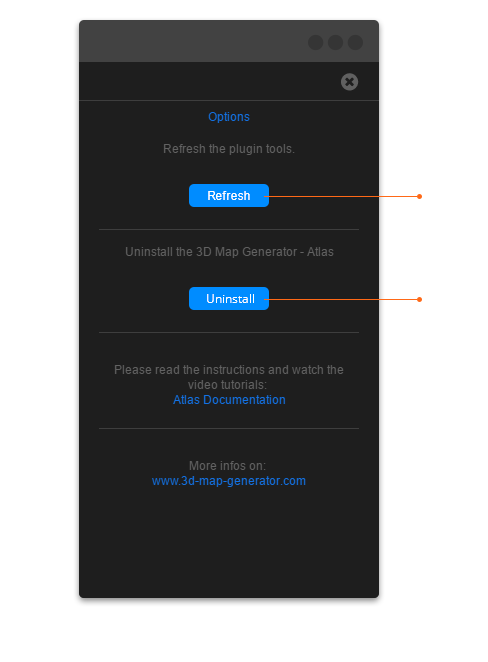
1.1 Refresh all needed tools (like styles, brushes and tools)
1.2 Uninstall the panel and tools
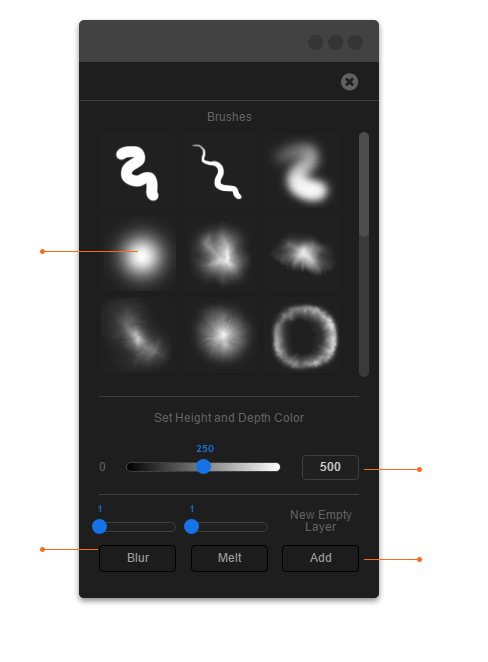
7.1 21 different brushes for designing or modifying your heightmap
7.2 A heightmap consists of grayscales between 0 (black) and 255 (white).
With this tool it is easy to select the different grayscales. Additionally you can
enter the highest point of your map into the text field on the right side. The tool then calculates which grayscale relates to which height. The value appears above the blue slider. That will help you to generate more accurate terrains.
7.3 Blur or/and melt your heightmap
7.4 Create a new empty layer
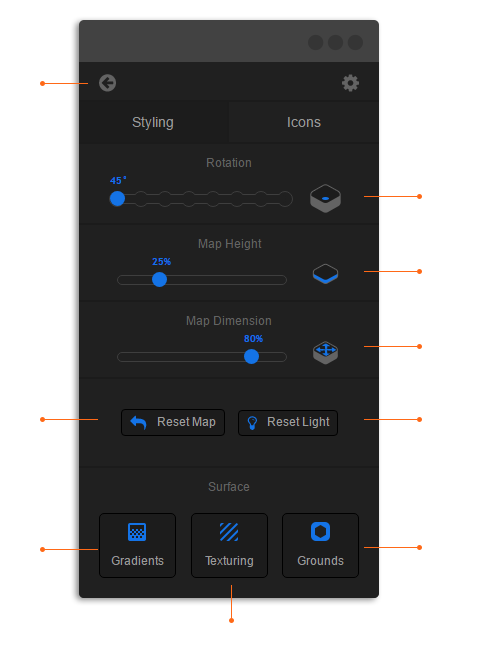
1 Back to home
2 Map rotation mit 8 isometrischen Winkeln
3 Sufenlose Map Höhen Einstellung
4 Stufenlos Map dimension Einstellung
5 Set and reset the light setting
6 Set the map setting back to default
7 Gradient presets panel
8 Texturing tools
9 Background presets
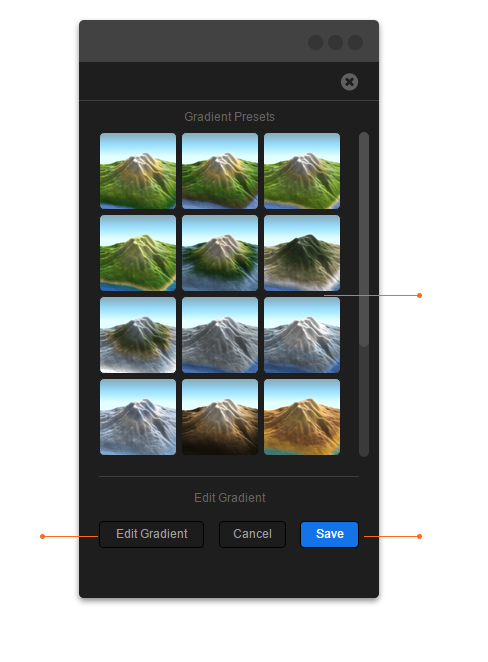
7.1 16 different gradient presets
7.2 / 7.3 To edit the gradient:
– click on the button “Edit Gradient” in the panel
– open the window > properties
– open the editor by clicking into the gradient
– after editing click “Save” in the panel

8.1.1 Edge color picker tool and Guides tool
8.1.2 Seamless textures: simply click on the desired texture and start to draw directly on the map
8.1.3 Different texturing brushes
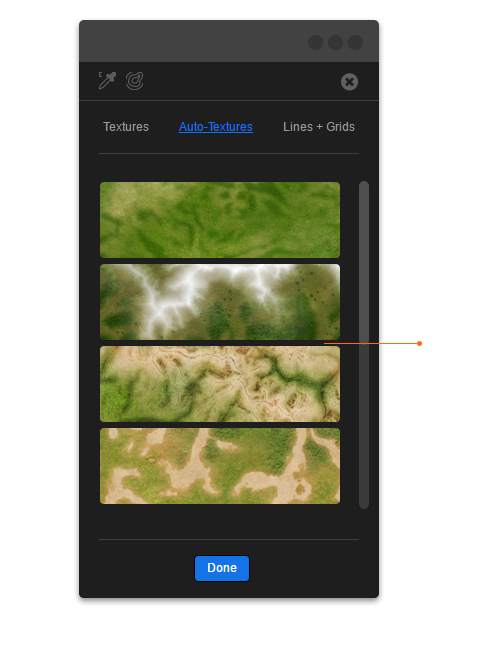
8.2.1 Auto-Texturing creates 8 different map textures automatically
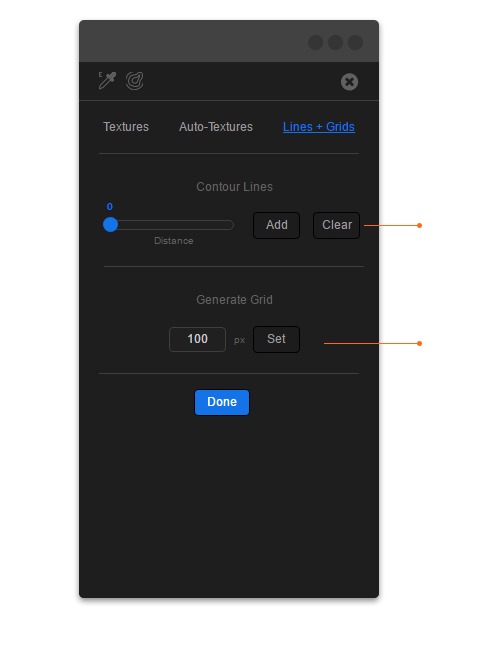
8.3.1 Generates contour lines in different spacing. You can choose the color, use
different spacings at the same time or delete all lines.
8.3.2 set grid with custom size and color
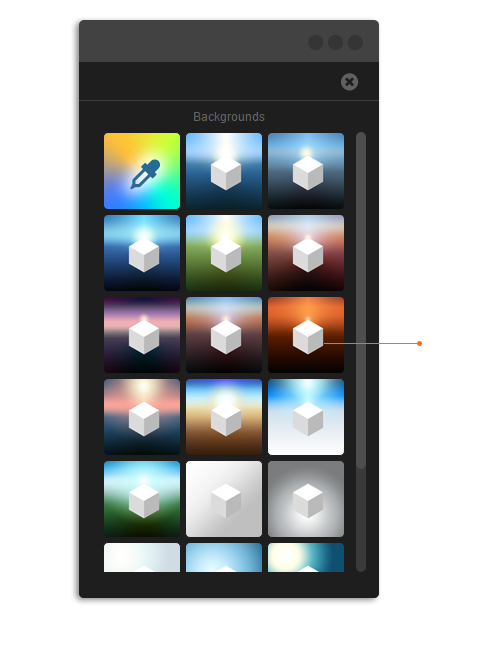
9.1 21 different background presets
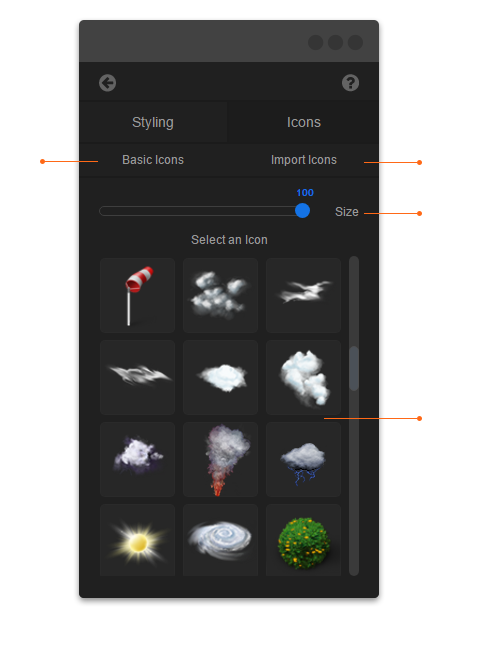
1 Basic icons for styling your 3D map
2 Add your own icons into the icon library
3 Set the icon size
4 More than 80 additional isometric icons
Visit the Heightmapper (purchase code needed)
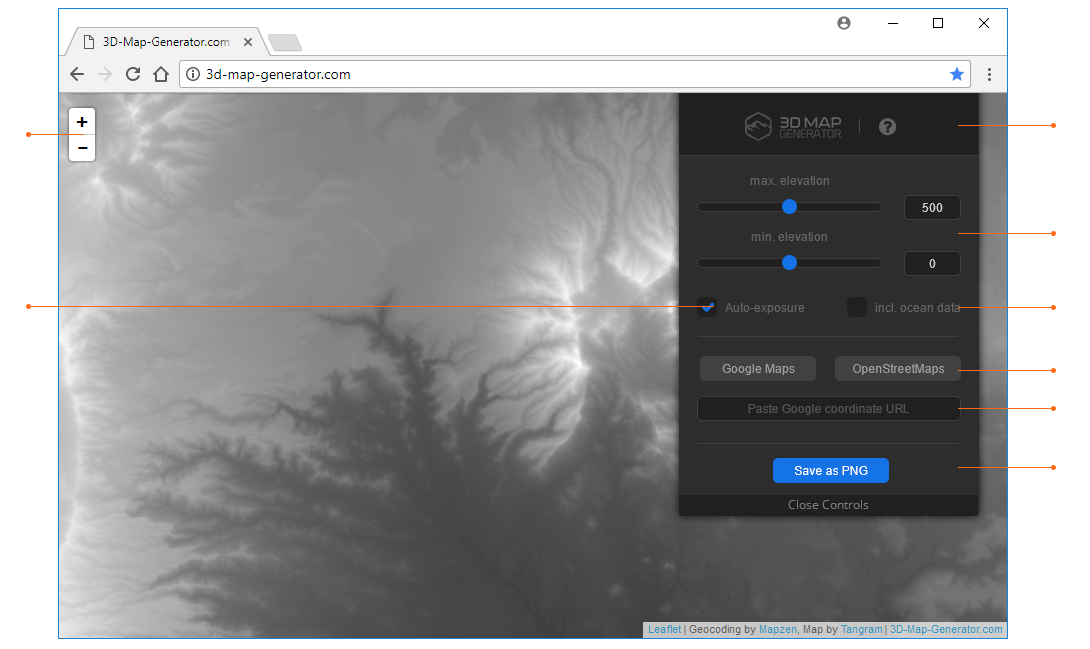
1 Zoom in/out
2 Help / Short instruction
3 Set the elevation
4 Auto-exposure
5 Show the ocean data
6 Go to Google Maps (or OpenStreetmap)
7 Paste the Google Maps coordinate URL
8 Save the result as PNG on your hard disk
To login the heightmapper page you`ll need your purchase code.